


Three simple techniques for recording acoustic guitar
Trying different recording techniques is a great way to learn how microphone placement can affect the sound of your recordings. In this article, we share three simple techniques for recording an acoustic guitar, a foundation for experimenting and finding the sound your song needs.
https://youtu.be/XIprzCsQeBM
What do you need to record an acoustic guitar?
You will need a microphone or, for the stereo technique, two. Condenser microphones are a common choice because of their ability to capture the details of the instrument.
For these techniques, you can use a large-diaphragm condenser, such as the RØDE NT1 Signature Black, or two small-diaphragm condensers, such as the RØDE NT5 Matched Pair. For stereo recording, distinguish between a single unit and a selected pair or matched pair.
You will also need an audio interface with microphone inputs and phantom power if your microphones require it. To record two microphones at once, make sure you have two inputs and can record them on independent tracks. Finally, you will need recording software or a DAW, such as GarageBand, Adobe Audition, Ableton Live, or REAPER.
Technique 1: Place a single microphone at the 12th fret
The first technique is ideal for getting started: it is simple and offers a balanced starting point for a wide range of recordings and mixes.
With the microphone mounted on a stand, place it approximately 20–30 cm from the strings, pointing at the 12th fret. Listen and adjust the distance according to the guitar, the performance, and the room. Avoid pointing directly at the center of the soundhole if too much bass appears.
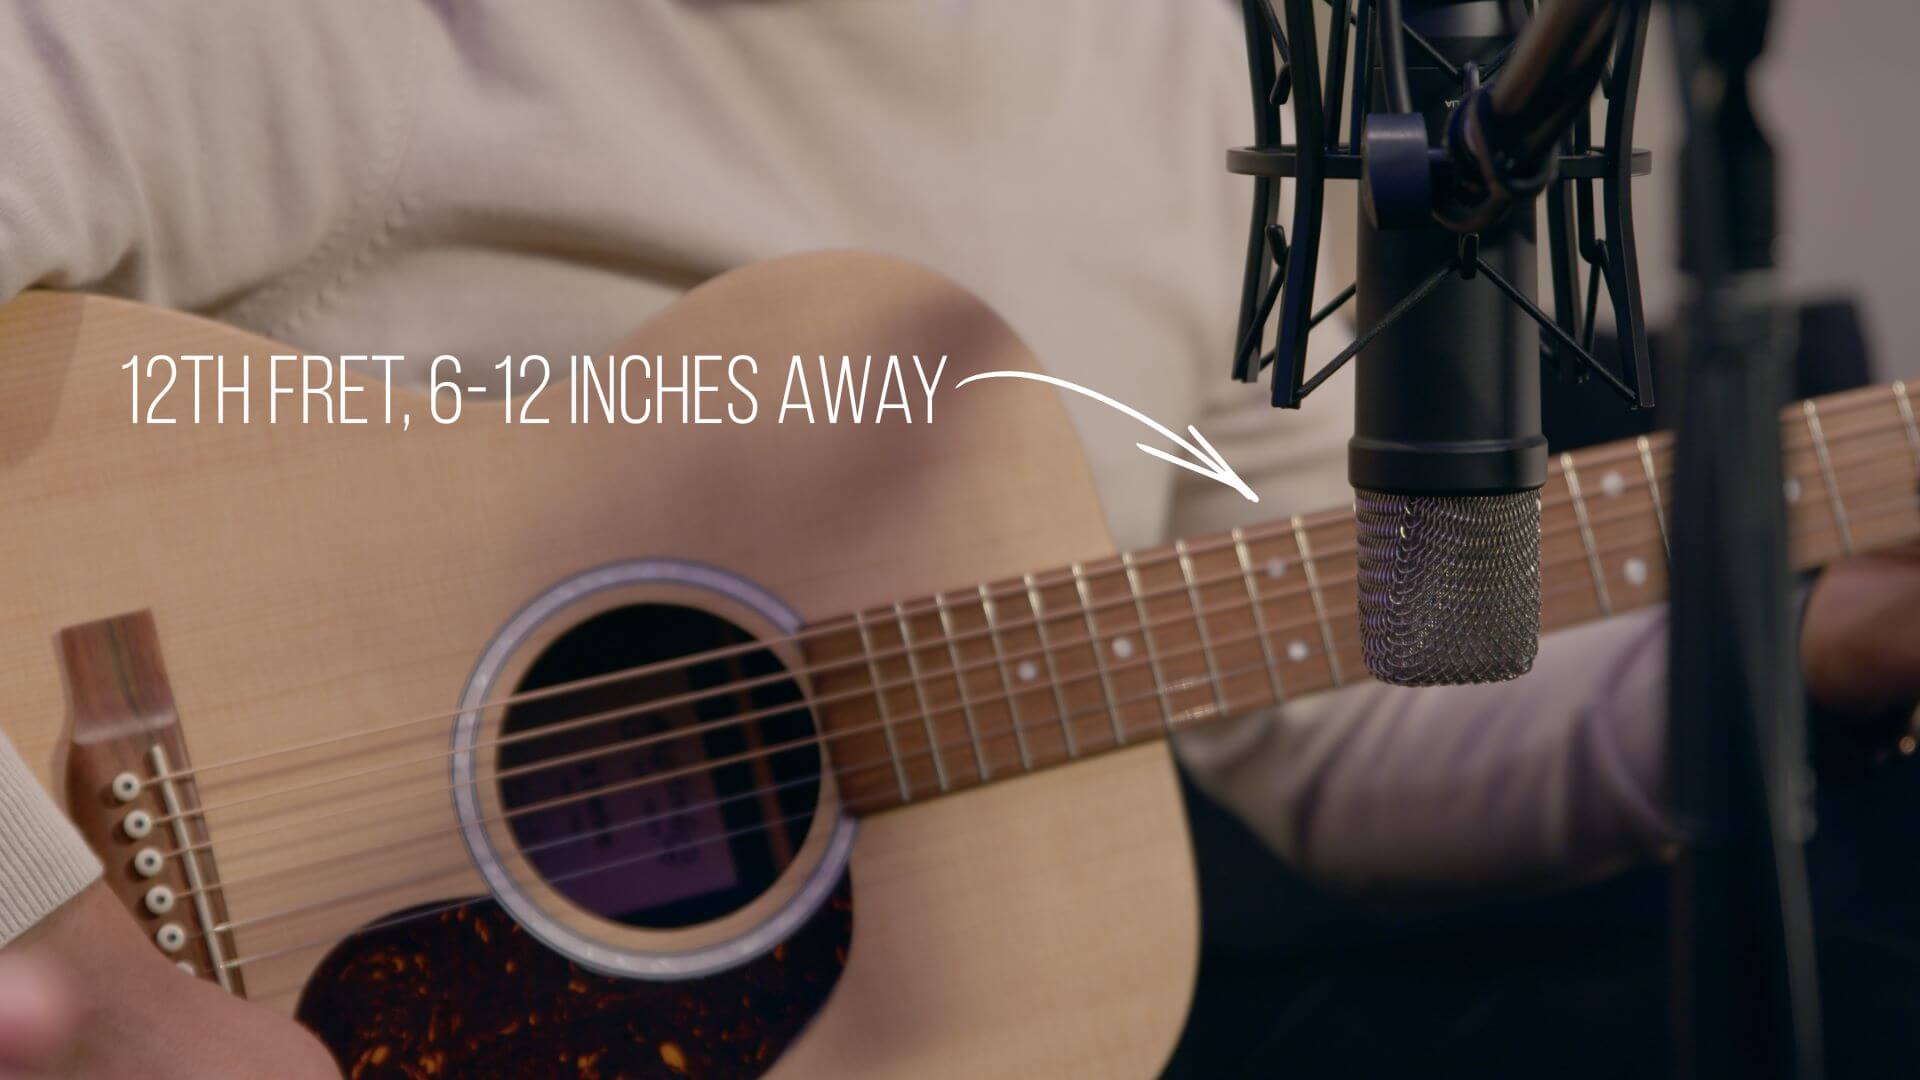
The microphone position is a starting point: small changes in distance and orientation can change the balance of the recording.
Technique 2: A single microphone at the bridge
The second technique also uses a single condenser microphone, but changes the focus point to explore another character.
Place it approximately 20–30 cm from the strings, oriented toward the area between the bridge and the soundhole. Compare this position with the one at the 12th fret: the balance between body, attack, and string noise will vary depending on the instrument and the microphone angle. Do not assume that one position will always be brighter than the other.
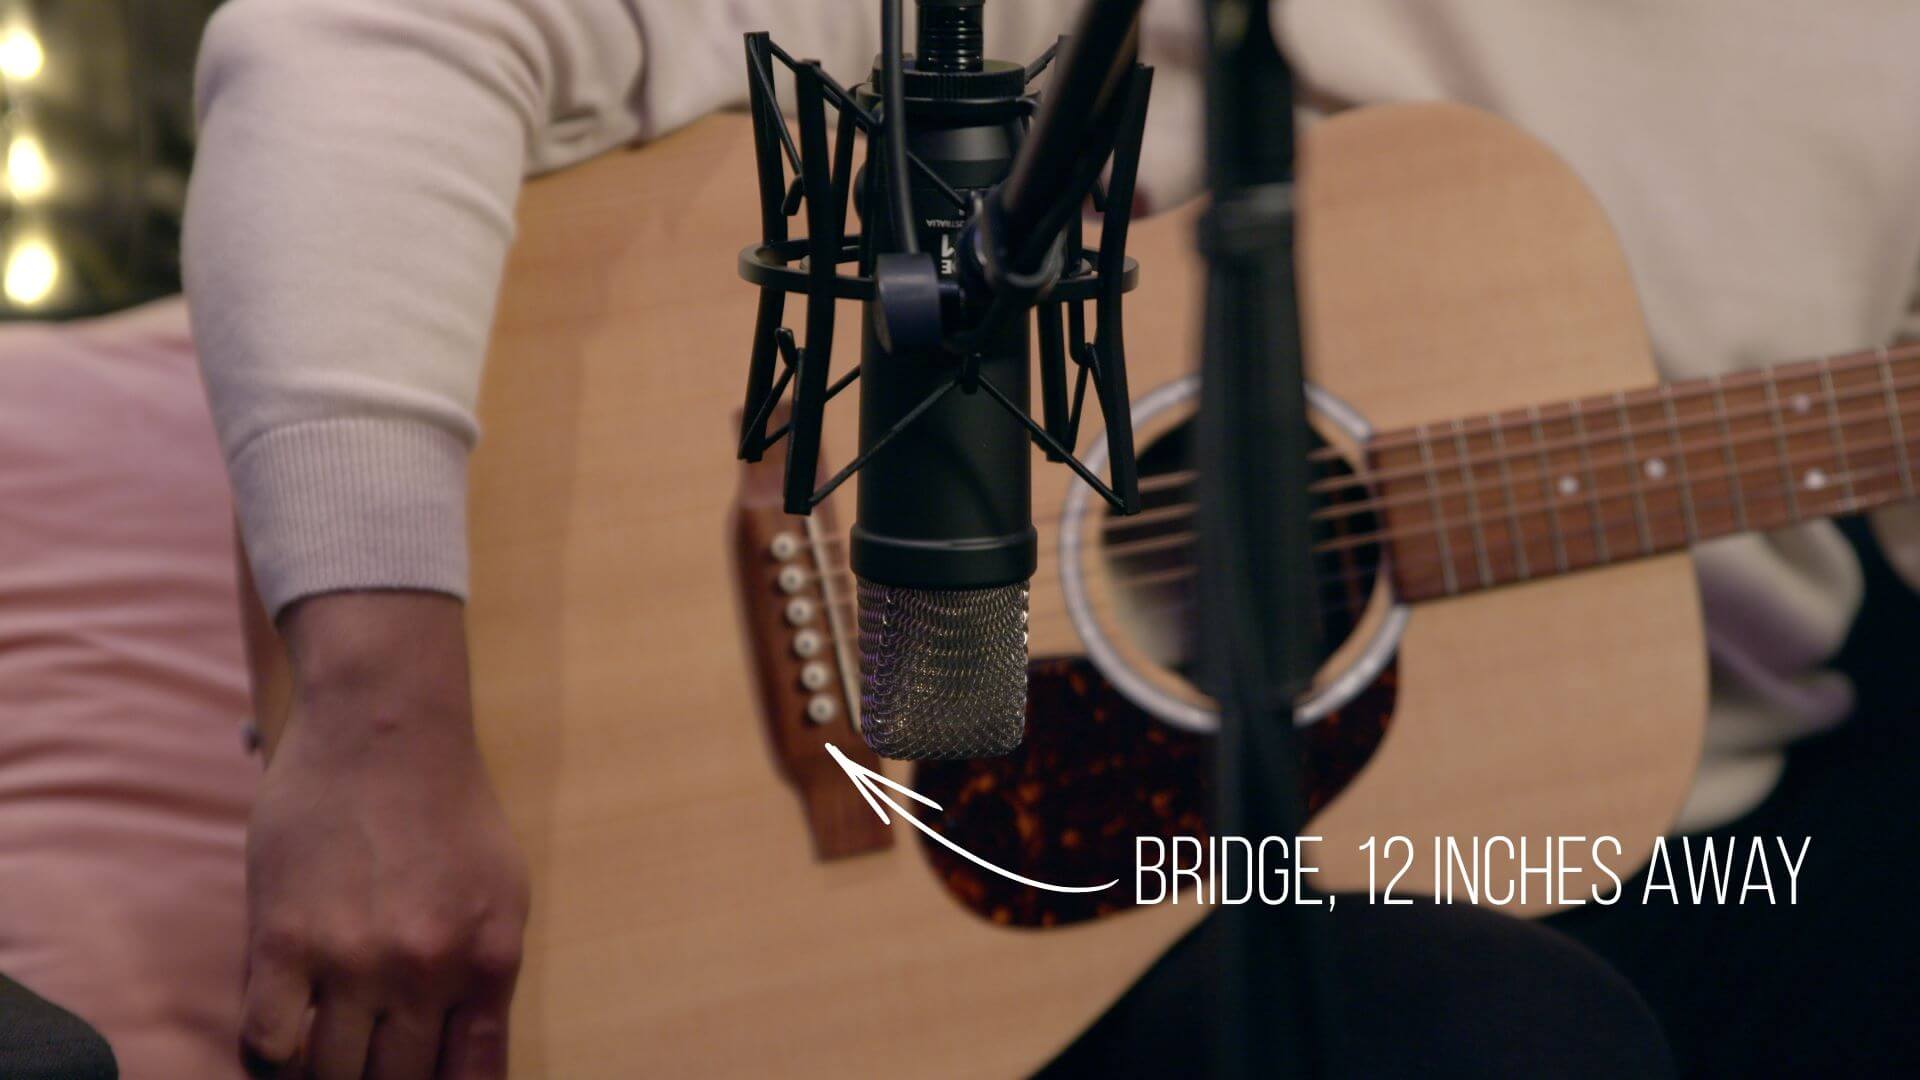
Try different orientations in the bridge area and listen to how the presence of the attack changes.
It can be a useful option to explore the percussive character of the performance or the nuances of fingerstyle. If you bring the microphone closer, also check the bass and finger noise before deciding on the final position.
Technique 3: X/Y stereo setup
The X/Y stereo setup allows you to capture a stereo image with two microphones and is especially useful when the guitar has a leading role.
How to place two microphones in an X/Y setup?
You will need two cardioid microphones, preferably of the same model and, if possible, a selected pair. Two small-diaphragm condensers, such as the RØDE NT5 Matched Pair, are an option for this setup. You will also need two microphone inputs that you can record separately.
Place the microphones with the capsules as close as possible, without touching, and their axes forming an angle of about 90 degrees. You can use a stereo bar or two stands. The proximity of the capsules reduces the differences in the arrival time of the sound, but does not replace checking the recording in mono.
As a starting point, place the set about 20–30 cm from the 12th fret area, with one microphone oriented toward the neck and the other toward the body. Adjust the distance and orientation of the set by listening to the result.
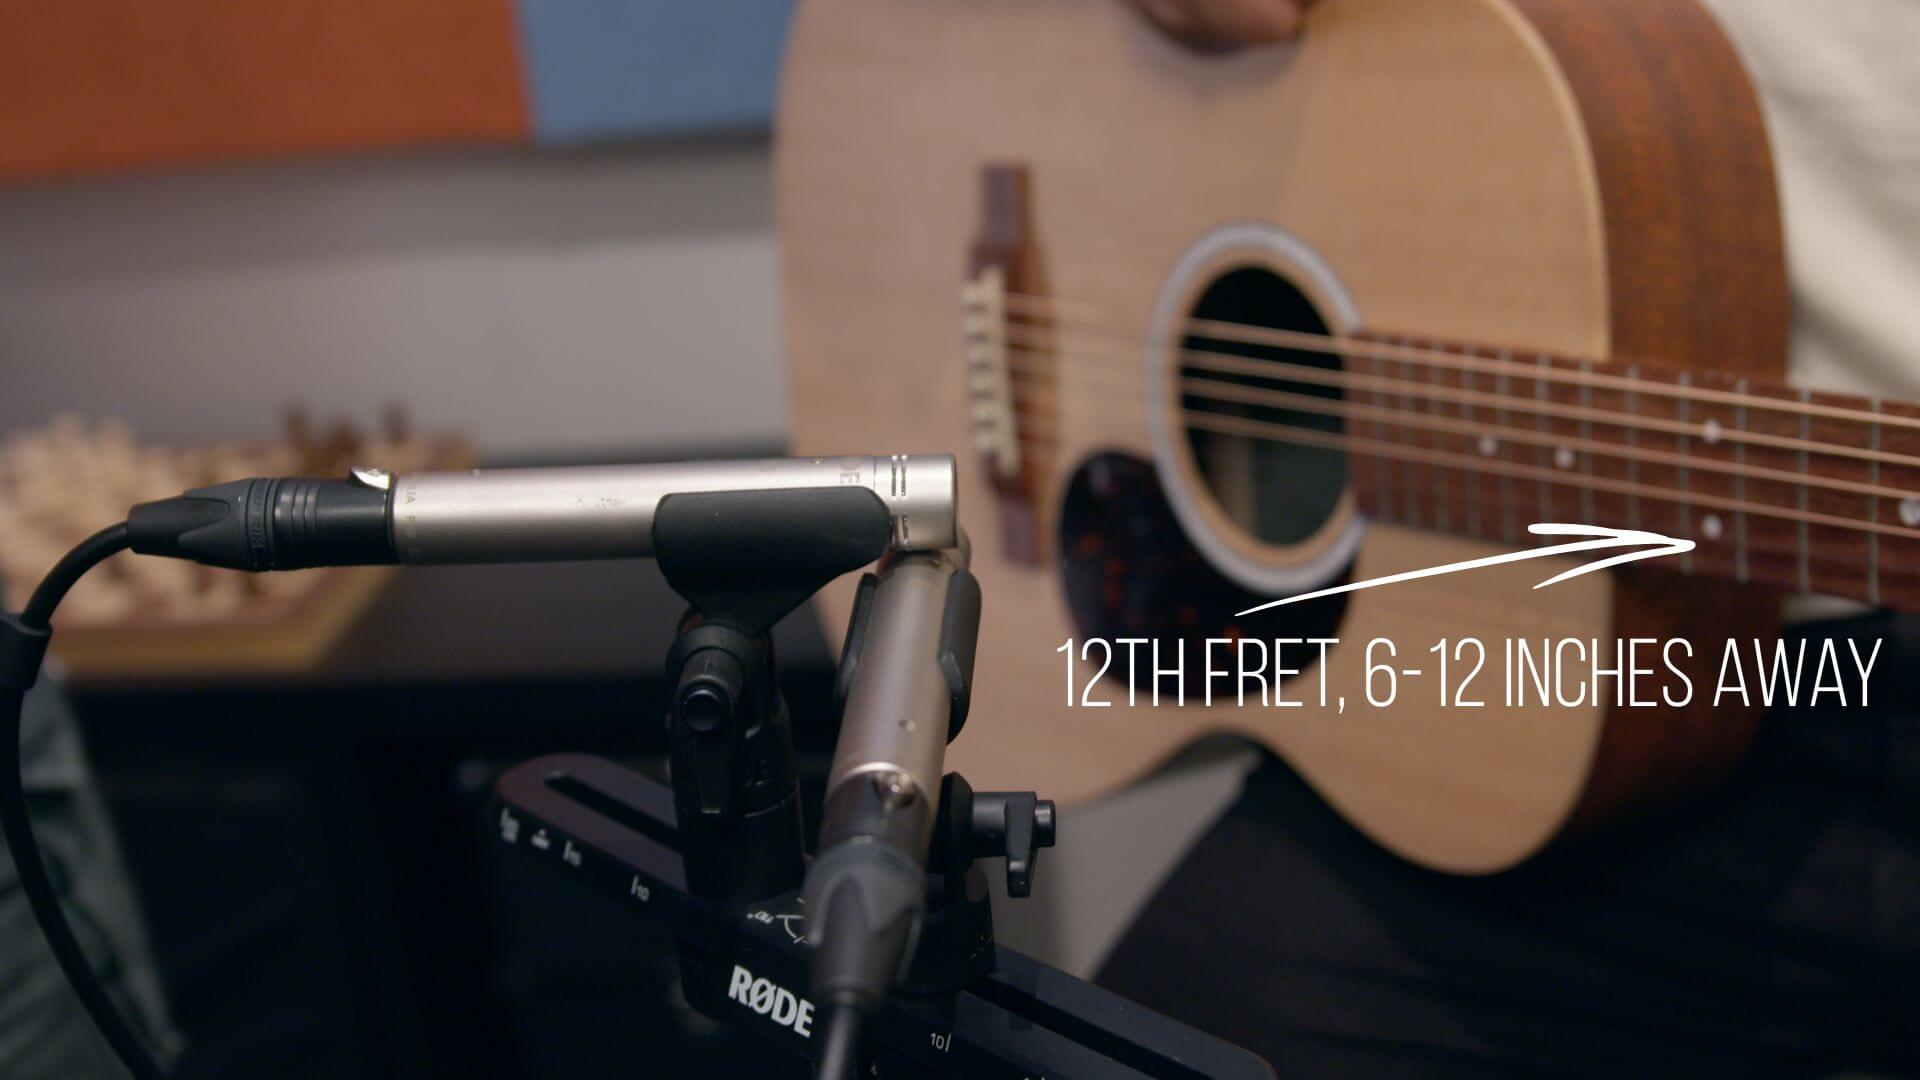
Record each microphone on an independent track in your DAW and pan one to the left and the other to the right. You can start with a full width and reduce it if the mix needs a more centered guitar.
With two coincident cardioid microphones, the sense of width is obtained mainly by the differences in level between both channels. Also listen in mono to check that the timbre maintains its balance.
An excellent starting point to keep experimenting! Compare the three techniques with the same fragment and choose the one that works best within the song, not just the one that sounds bigger on its own.
Frequently asked questions about recording acoustic guitar
Where to place the microphone to record acoustic guitar?
Start about 20–30 cm from the strings, pointing at the 12th fret. Adjust the distance and orientation while listening: if too much bass appears, avoid directing it at the center of the soundhole.
Do I need one or two microphones?
One microphone allows you to record the guitar in mono and is enough to get started. For the X/Y stereo technique, you need two cardioid microphones and two microphone inputs that you can record on independent tracks.
How to check a stereo recording in mono?
Activate mono listening in your DAW or monitoring system and compare the result with the stereo version. If the sound loses a lot of body or changes significantly, check the microphone placement before repeating the take.
Buy microphones online for your next recording
Want to put these techniques into practice? Choose the RØDE NT1 Signature Black to record with a single microphone or the RØDE NT5 Matched Pair to explore X/Y stereo recording.
Check the price and availability on the product page of the model you prefer and place your order online at microFusa.


